 Save
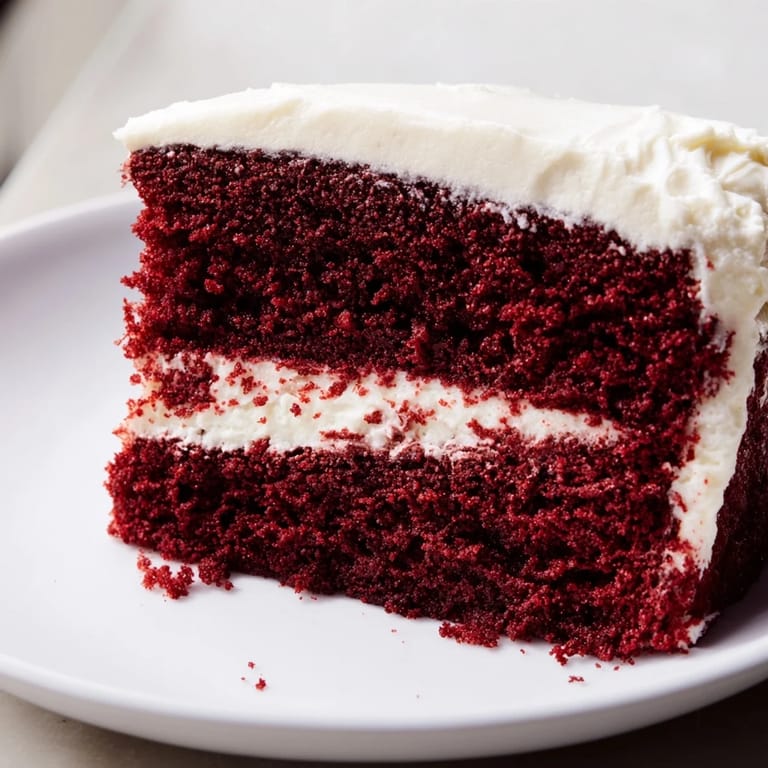
Save My neighbor handed me a slice wrapped in wax paper one Sunday afternoon, and I swore I tasted velvet before I even noticed the color. That cake changed everything I thought I knew about cocoa and tang working together. The frosting clung to my fork in the most wonderful way, and I knew I had to learn it myself. Three attempts later, I finally cracked the balance between moist crumb and that signature red hue. Now it shows up at every birthday in my house, and no one complains.
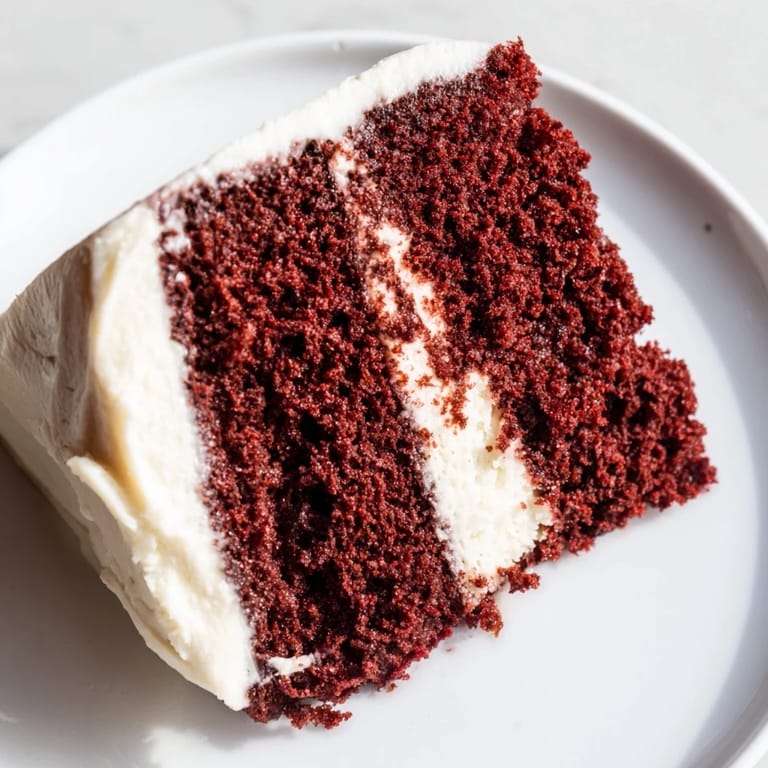
I made this for my sister's graduation party, and she cried when she saw the layers stacked high with that white frosting spilling over the edges. She said it reminded her of the cake our grandmother used to bring to church socials, though I never got that recipe. I think the memory mattered more than the accuracy. Either way, the whole thing disappeared before the sun went down, and I found myself scraping frosting off the plate with my finger when no one was looking.
Ingredients
- All purpose flour: Sift it well or your crumb will be dense, and this cake lives or dies by its texture.
- Unsweetened cocoa powder: Just enough to add depth without turning this into a chocolate cake, so measure carefully.
- Baking soda: This reacts with the buttermilk and vinegar to give you that rise and tender crumb.
- Granulated sugar: Creaming it with the butter is where the magic starts, so don't rush this step.
- Unsalted butter: Let it soften on the counter for an hour so it beats into the sugar without clumping.
- Eggs: Room temperature eggs blend smoother and create a more even batter.
- Buttermilk: The tang is essential, and it keeps the cake moist for days.
- Vanilla extract: Use the real stuff if you can, it makes a difference you can taste.
- White vinegar: It sounds odd, but this tiny splash activates the baking soda and adds a hint of brightness.
- Red food coloring: Gel coloring gives you the deepest red without thinning the batter.
- Vegetable oil: This keeps the crumb soft even after the cake cools completely.
- Cream cheese: Soften it fully or you will have lumps in your frosting, and no one wants that.
- Powdered sugar: Sift it before adding or you will be chasing little sugar pebbles around the bowl.
Tired of Takeout? 🥡
Get 10 meals you can make faster than delivery arrives. Seriously.
One email. No spam. Unsubscribe anytime.
Instructions
- Prep Your Pans:
- Preheat your oven to 350 degrees and grease those pans like your life depends on it, then dust them with flour and tap out the excess. This step saves you from heartbreak when the cake sticks.
- Sift the Dry Ingredients:
- Combine flour, cocoa, baking soda, and salt in a bowl and whisk them together until no streaks remain. Set this aside and resist the urge to skip the sifting.
- Cream the Butter and Sugar:
- Beat them together until the mixture turns pale and fluffy, which takes about three minutes with an electric mixer. This is where air gets trapped and your cake gets its lift.
- Add Eggs and Liquids:
- Mix in the eggs one at a time, then stir in the oil, vanilla, and vinegar until everything is smooth. The batter will look a little loose, and that is exactly right.
- Combine Buttermilk and Coloring:
- Stir the red food coloring into the buttermilk in a small bowl until it is evenly tinted. This keeps the color from streaking through your finished cake.
- Alternate Wet and Dry:
- Add the flour mixture in three parts, alternating with the buttermilk mixture, and start and end with the dry ingredients. Mix just until combined or you will toughen the crumb.
- Bake the Layers:
- Divide the batter evenly between your pans and bake for 28 to 30 minutes, until a toothpick comes out clean. The tops should spring back when you touch them lightly.
- Cool Completely:
- Let the cakes rest in the pans for 10 minutes, then turn them out onto wire racks. Patience here is non negotiable, frosting a warm cake is a recipe for disaster.
- Make the Frosting:
- Beat the cream cheese and butter together until smooth, then gradually add the powdered sugar, vanilla, and a pinch of salt. Stop when it is light and fluffy, not a second sooner.
- Assemble and Frost:
- Place one cake layer on your serving plate, spread frosting over the top, then add the second layer and frost the top and sides. Use a spatula to smooth it out or leave it rustic, both look beautiful.
 Save
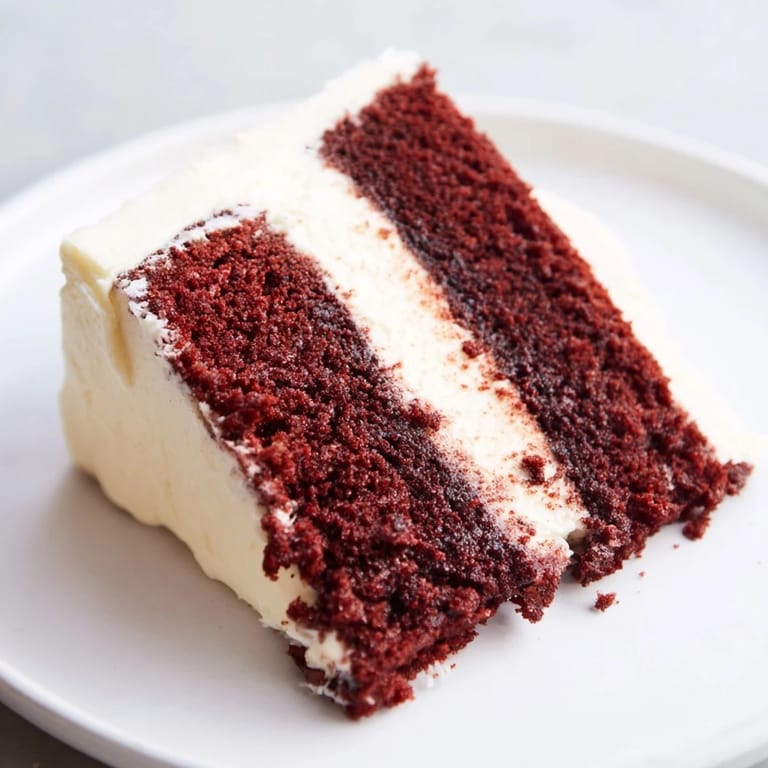
Save The first time I brought this to a potluck, someone asked if I bought it from a bakery, and I have never felt more proud. My hands were shaking when I cut the first slice, but the layers were even and the frosting held its shape. Everyone went quiet for a moment, and then the compliments started rolling in. That cake made me feel like I had finally earned my place at the table, and I have been baking it ever since.
How to Get the Perfect Red Color
Liquid food coloring will give you a pinkish tint at best, so invest in gel coloring if you want that deep crimson hue. I learned this the hard way after baking a cake that looked more like strawberry milk than red velvet. Start with one ounce and add more if you want it darker, but remember the color deepens as it bakes. Some bakers swear by mixing red and a tiny drop of brown to get that vintage look, and I think they are onto something.
Storage and Serving Tips
This cake keeps beautifully in the fridge for up to five days, covered loosely with plastic wrap or in a cake dome. Let it sit at room temperature for about 20 minutes before serving so the frosting softens and the flavors wake up. I have served it cold straight from the fridge on hot summer days, and no one seemed to mind. If you want to freeze it, wrap individual slices in plastic and foil, and they will last up to three months without losing any magic.
What to Serve Alongside
I love pairing this with strong black coffee in the afternoon or a glass of bubbly sparkling wine if it is a celebration. Fresh raspberries on the side cut through the richness and add a little brightness to each bite. Some people like vanilla ice cream with it, and I will not argue with that logic.
- A small dish of mixed berries adds color and a tart contrast to the sweet frosting.
- Whipped cream on the side is never a bad idea if you are feeling indulgent.
- Hot tea works beautifully if you are serving this at a casual afternoon gathering.
 Save
Save This cake has become my go to whenever I want to show someone I care, and it never lets me down. I hope it brings you as much joy as it has brought me.
Recipe FAQs
- → What gives the cake its red color?
The vibrant red tone comes from red food coloring added to the buttermilk mixture, enhancing its signature look.
- → How can I ensure the cake stays moist?
Using buttermilk and oil, and avoiding overmixing the batter, helps maintain a tender, moist texture throughout.
- → Can I use alternative frostings?
While cream cheese frosting complements the cake's tang, buttercream or mascarpone frostings also pair well for a creamy finish.
- → What tools are needed to bake this cake?
Essential tools include 9-inch round pans, mixing bowls, electric mixer, spatula, wire rack, and a sifter for dry ingredients.
- → How long should the cake cool before frosting?
Allow the cake to cool completely on wire racks, about an hour, to ensure the frosting spreads smoothly without melting.