 Save
Save Last spring, my daughter came home buzzing about her graduation party, and I realized I had exactly one week to figure out something special that didn't scream store-bought. Cake pops seemed like the answer—elegant enough to impress, fun enough to make together, and the perfect canvas for her school colors. Watching her eyes light up when she realized we could dip them in purple and gold felt like the whole celebration distilled into one moment. These little spheres became our inside joke that summer, so much so that we still make them for every milestone now.
I'll never forget standing in the kitchen at midnight, my husband asking why I was still awake, while I was arranging the final batch in that Styrofoam block like I was conducting some kind of delicious orchestra. My daughter wandered down in her pajamas, saw the purple and gold glittering under the kitchen light, and just sat on the counter eating them straight from the block while telling me about her college plans. That's when it hit me that cake pops aren't really about the cake at all—they're about making something with intention for people you love.
Ingredients
- Vanilla or chocolate cake mix (1 box): This is your shortcut to a tender crumb without fussing with flour measurements, and honestly, no one will know you didn't bake from scratch.
- Unsalted butter (1/2 cup): Softened means it'll blend smooth with the sugar, creating that frosting that holds everything together without being overly sweet.
- Powdered sugar (1 1/2 cups): The fine texture dissolves into the frosting, making it silky rather than gritty, which matters when you're mixing it with crumbled cake.
- Milk (1 tablespoon): Just enough to loosen the frosting so it coats the cake crumbs without making the mixture fall apart when you roll it.
- Vanilla extract (1 teaspoon): A small amount that reminds you this is dessert and not just colored fondant.
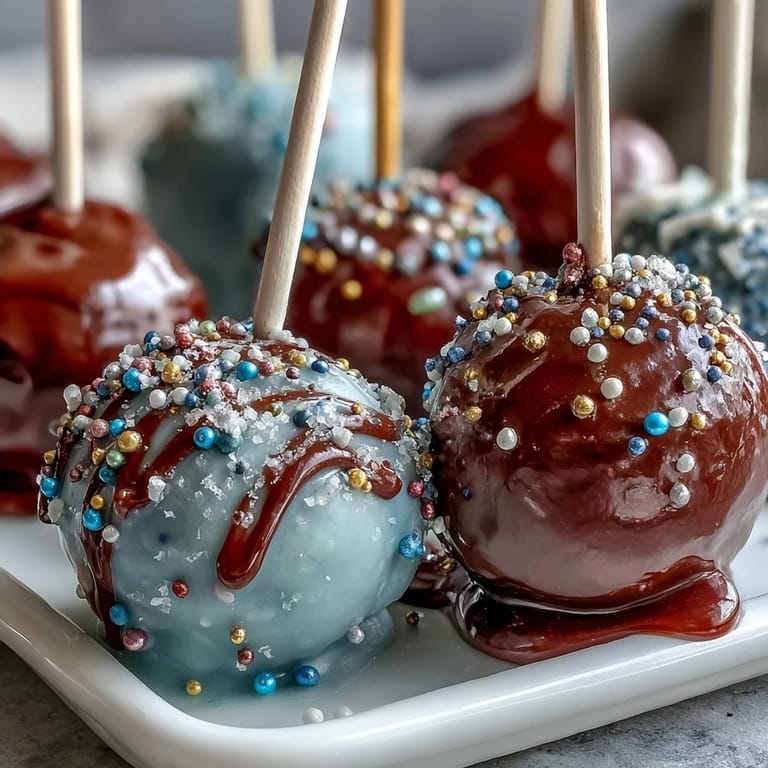
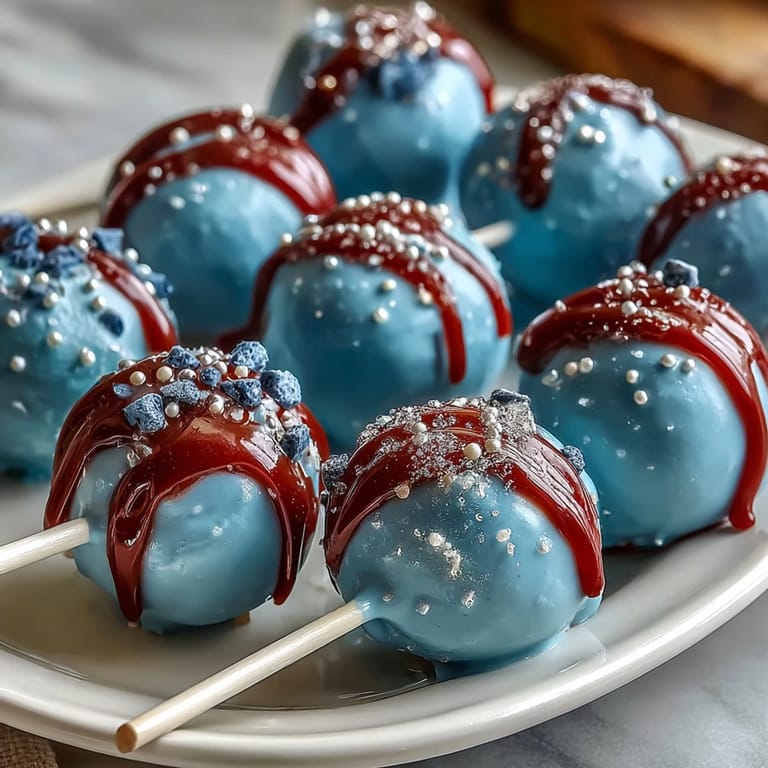
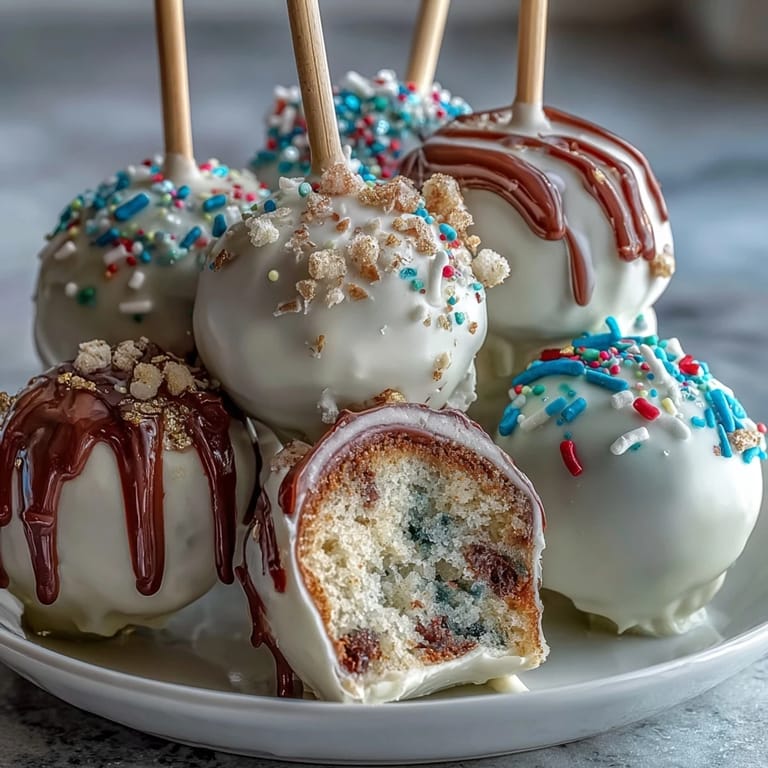
- Candy melts in school colors (450 g): The workhorse of this project—they melt smoothly and set quickly, giving you that snappy shell everyone expects.
- Vegetable shortening or coconut oil (2 tablespoons, optional): Thinning the candy melts makes them flow like silk for dipping, preventing thick clumpy coats that crack when you bite into them.
- Gold sprinkles or edible gold glitter: The celebration in sprinkle form—apply while the coating is still wet or they'll slide right off.
- Lollipop sticks (24): These give you something to hold onto and turn humble cake balls into the kind of treat you see at fancy bakeries.
Tired of Takeout? 🥡
Get 10 meals you can make faster than delivery arrives. Seriously.
One email. No spam. Unsubscribe anytime.
Instructions
- Bake your base:
- Follow the box directions exactly, because this is the foundation everything else rests on. The smell of cake baking is half the reason to do this, so don't rush it—let it cool completely on a wire rack while you clean up, which is oddly meditative.
- Whip the frosting:
- Start your mixer with just the softened butter and let it go for a minute until it's pale and fluffy, almost like whipped cream. Gradually add the powdered sugar so it doesn't explode everywhere, then the milk and vanilla, beating until you have something that tastes like the middle of a cupcake.
- Build the mixture:
- Crumble the cooled cake into a bowl with your hands—really break it down into fine crumbs—then start folding in the frosting a few tablespoons at a time. You're looking for something that holds together when you squeeze it but still feels like crumbled cake, not wet dough.
- Roll with intention:
- Use a small cookie scoop or your hands to make balls about the size of walnuts, keeping them consistent so they cook evenly when dipped. Roll them smooth between your palms and place them on parchment, then slide the whole sheet into the fridge for an hour—this chill is non-negotiable because warm cake balls fall off sticks.
- Anchor those sticks:
- Dip each cake ball into melted candy to coat:
- Melt a bit of your first color in a small bowl, then dip the stick tip and push it gently halfway into each ball. This acts like edible glue so your pops don't become popsicles mid-celebration.
- Set up two bowls of melted candy melts (one for each school color) and work steadily—dip each pop, twirl gently to let excess drip off, then immediately place it upright in the Styrofoam block. You want to move quickly before the coating sets, which takes only a minute or two.
- Add the sparkle:
- While the candy coating is still tacky and glistening, shower each pop with gold sprinkles or dust it with edible glitter. This is where they stop looking homemade and start looking like something from a fancy celebration boutique.
- Let them set:
- Give them at least thirty minutes in a cool room before you touch them again—impatient hands will leave fingerprints on your pretty coating.
 Save
Save One afternoon, my neighbor saw the finished pops lined up in their block and asked if I was starting a bakery business. I laughed, but the next week she called asking for the recipe because she wanted to make them for her son's graduation. There's something about creating something beautiful with your hands that makes people want to do it themselves—and that's when I knew these weren't just cake pops, they were an invitation to celebrate together.
Picking Your Colors
The school colors are the whole point, so lean into that choice completely. If your school colors are dark, consider using white or a contrasting lighter candy melt as your second color so both options photograph beautifully. When I made a batch in deep navy and gold, the gold really sang against it, but when I tried navy and silver on a different occasion, the silver looked almost invisible. Your lighting matters too—bright kitchen light shows off metallics best, so if you're making these for an evening event, test your colors in that lighting before you commit to coating all twenty-four pops.
The Timing Game
I used to think I had to make these all in one sitting, but I learned that you can actually bake and crumble the cake the day before, refrigerate the mixed cake-frosting balls overnight, and then do all your dipping and decorating the morning of your event. This completely changes the stress level, because instead of racing against time, you're just spending a relaxing hour or so dipping and sprinkling while drinking coffee. The cold balls actually cooperate better with the candy coating anyway, so breaking it into steps is really a win for both your schedule and your pops.
Storage and Sharing
Room temperature is actually fine for these—they'll stay fresh and snappy for up to three days in an airtight container, which is perfect for graduation parties where you want to give them away or display them over a few days. I've also refrigerated them for up to a week when I made a double batch for two different celebrations, and they tasted almost exactly the same, just slightly less sweet since the cold mutes flavors a bit. The real secret is keeping them covered so they don't dry out or pick up fridge smells, and if you're packaging them for gifts, those little treat boxes with tissue paper make even a homemade batch feel like something precious.
- Wrap individual pops in cellophane and tie with ribbon in school colors for graduation party favors that feel thoughtful.
- Make them three to four days ahead, store them in layers separated by parchment paper, and give yourself breathing room on the big day.
- If a pop ever cracks or the coating looks imperfect, that's character—no one will notice once they taste it.
 Save
Save These cake pops have become more than just a recipe in our house—they're our quiet celebration, the thing we make together when someone we love is moving forward into something new. Every time you make them, you're creating something that tastes like joy and looks like pride, and that's worth every second of the effort.
Recipe FAQs
- → What flavors work best for these cake pops?
Vanilla and chocolate cake mixes are popular choices, but feel free to use any preferred flavor to match your taste or theme.
- → How can I ensure the coating is smooth?
Adding vegetable shortening or coconut oil to the melted candy melts helps achieve a glossy, smooth dip on the cake pops.
- → What is the best way to insert the sticks securely?
Dipping the stick end into melted candy melts before inserting it halfway into the cake ball ensures the stick stays firmly in place during coating.
- → Can these pops be made ahead of time?
Yes, after coating and decorating, they can be stored in an airtight container at room temperature for up to 3 days or refrigerated for up to a week.
- → How do I achieve vibrant school colors on the pops?
Use candy melts in your specific school colors, and for contrast on darker cake bases, choose coordinating candy melt shades for a bold effect.